Painting the exterior masonry of your house not only enhances its curb appeal but also protects it from the elements. In this detailed step-by-step guide, we will walk you through the process of painting exterior masonry, including preparation, removal, and solutions for paint splatters and spills. From choosing the right masonry paint colours to achieving a professional finish, we've got you covered.
1. Understanding Masonry Paint
What is Masonry Paint?
Masonry paint is a specially formulated paint designed for use on exterior masonry surfaces such as brick, concrete, and stucco. It protects against weathering and enhances the appearance of the surface.
Benefits of Using Masonry Paint:
- Weather Resistance: Masonry paint offers excellent protection against harsh weather conditions, including rain, UV rays, and temperature fluctuations.
- Durability: It forms a strong bond with the masonry surface, ensuring long-lasting results and minimizing the need for frequent repainting.
- Breathability: Unlike regular paint, masonry paint allows the surface to breathe, preventing moisture buildup and potential damage.
- Water Repellency: It creates a protective barrier that repels water, reducing the risk of dampness and mould growth.
Popular Masonry Paint Brands and Colours:
- Sandtex Masonry Paint: Known for its high-quality and extensive colour range, including shades of grey, white, black, and blue.
- Dulux Weathershield Masonry Paint: A trusted brand offering a wide selection of colours and excellent durability.
Exploring Different Textures and Finishes in Masonry Paint:
- Textured Masonry Paint: Ideal for adding depth and character to the surface, textured paint creates a decorative and unique finish. It is available in various textures, such as rough, fine, or medium.
- Smooth Masonry Paint: Provides a sleek and even finish, perfect for a modern and clean look.
2. Preparation
Assessing the Surface:
- Checking for Cracks, Flaking, or Damaged Areas: Inspect the masonry surface thoroughly for any signs of damage. Repair or replace any cracked or deteriorated areas before painting.
- Repairing and Patching Damaged Masonry: Use suitable filler or mortar to fill in cracks and repair any damaged sections. Smooth the surface for an even finish.
Cleaning the Surface:
- Removing Dirt, Dust, and Grime: Start by sweeping away loose debris and dirt using a stiff brush. Use a power washer or hose with a high-pressure nozzle to remove stubborn dirt and grime.
- Power Washing or Scrubbing: If necessary, power wash the surface to ensure a clean and uniform base. Alternatively, scrub the surface with a mild detergent and a stiff brush, then rinse thoroughly.
- Using a Mildew Cleaner for Mold or Mildew Growth: If you notice any mold or mildew on the masonry, use a mildew cleaner or a mixture of bleach and water to eliminate the growth. Scrub gently and rinse well.
Removing Existing Paint:
- Scrape off Loose or Peeling Paint: Use a scraper or wire brush to remove any loose or peeling paint from the surface. Ensure all loose paint is removed to achieve a smooth finish.
- Sanding the Surface for Smoothness: If needed, sand the surface using sandpaper or a sanding block. This step helps create a smooth and even texture, particularly when using textured masonry paint. (Sandtex masonry paint is a suitable option for this process.)
- Using a Paint Stripper for Stubborn Paint Layers: If there are stubborn layers of paint that cannot be removed by scraping or sanding, consider using a paint stripper specifically designed for masonry surfaces. Follow the manufacturer's instructions carefully and ensure proper ventilation.
3. Painting Process
Gather Your Materials:
- Masonry Paint: Choose a high-quality masonry paint suitable for your desired colour and finish. Options include white, grey, black, and other popular colours.
- Brushes, Rollers, and Paint Trays: Select appropriate brushes and rollers for the size and texture of the masonry surface. Use a paint tray or bucket for easy access to the paint.
- Protective Gear: Wear gloves, goggles, and a mask to protect yourself from paint splatters and fumes.
- Drop Cloths or Plastic Sheets: Cover the surrounding areas and any vegetation with drop cloths or plastic sheets to prevent paint splatters.
- Extension Pole: If needed, use an extension pole to reach high or inaccessible areas.
- Ladder or Scaffolding: For multi-story buildings, use a ladder or scaffolding to safely access all areas.
Prime the Surface:
- Applying a Masonry Primer: Depending on the condition of the surface and the type of masonry paint used, it may be necessary to apply a masonry primer. Follow the manufacturer's instructions for the specific primer and allow it to dry completely before proceeding.
Applying the Masonry Paint:
- Stirring the Paint Thoroughly: Open the paint can and stir the contents thoroughly using a stir stick. This ensures an even distribution of pigments and additives.
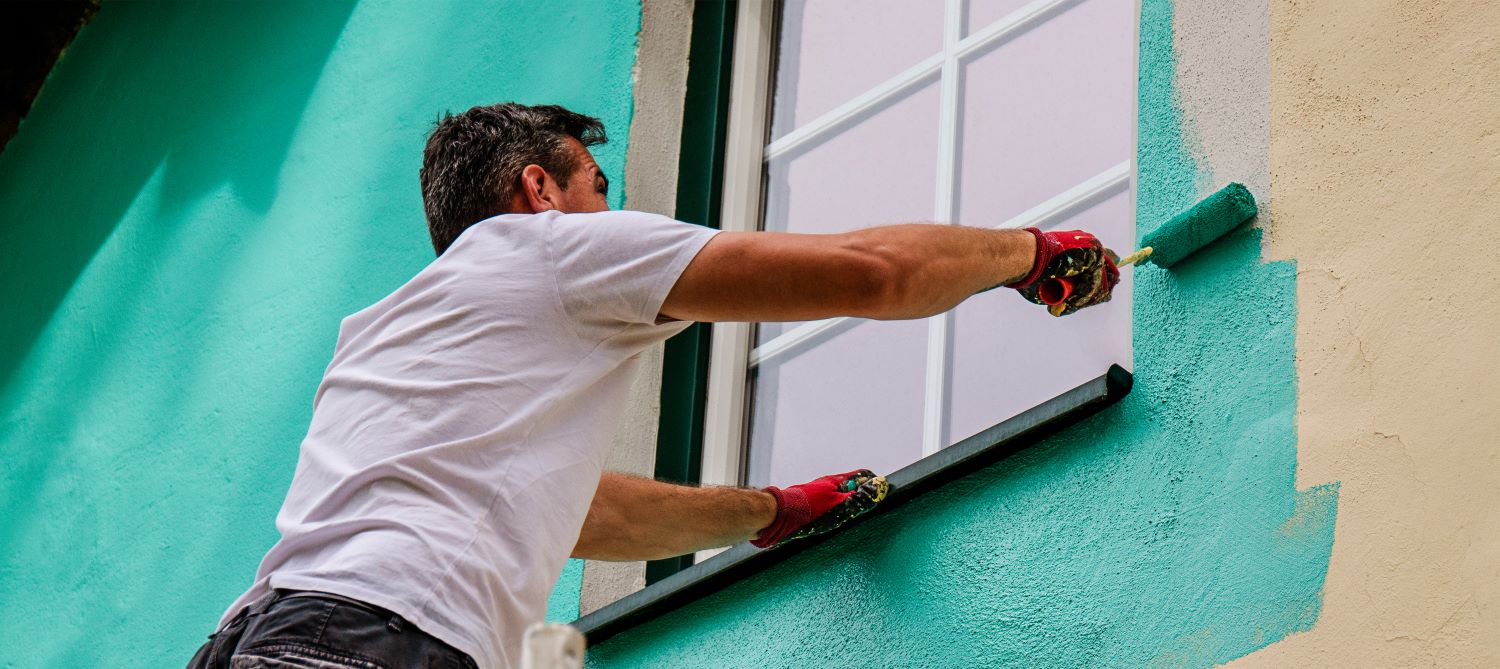
- Starting from the Top and Working Down: Begin painting at the top of the masonry surface and work your way down. This prevents paint drips from affecting already painted areas.
- Using Brushes for Corners and Edges: Use a high-quality brush to carefully paint corners, edges, and hard-to-reach areas. Ensure even coverage and smooth application.
- Using Rollers for Large Surfaces: For larger areas, such as walls, use a roller with a suitable nap. Apply the paint in overlapping vertical or horizontal strokes for consistent coverage.
- Applying Multiple Coats for Desired Coverage: Depending on the color and texture of the masonry, you may need to apply multiple coats of paint. Follow the manufacturer's instructions regarding drying times between coats.
Drying and Curing:
- How Long Does Masonry Paint Take to Dry? Allow the paint to dry according to the manufacturer's instructions. Drying times can vary depending on factors such as temperature and humidity.
- Curing Time for Long-Lasting Results: To achieve optimal durability and long-lasting results, allow the paint to cure fully. This typically takes several days or as recommended by the paint manufacturer.
4. Dealing with Paint Splatters and Spills
How to Remove Masonry Paint from Surfaces and Plants:
- Promptly clean up any paint splatters or spills on unintended surfaces using a damp cloth or sponge.
- For dried or stubborn paint stains, carefully scrape them off using a plastic scraper or putty knife. Be cautious not to damage the surface beneath.
Immediate Steps to Minimize Damage:
- If paint splatters or spills on plants or grass, immediately rinse the affected area with water to dilute and remove the paint. Take care not to oversaturate the soil.
- Protect nearby plants by covering them with plastic or a drop cloth before painting.
Using Suitable Solvents or Cleaners for Different Surfaces:
- If paint splatters on surfaces such as glass, metal, or plastic, use a suitable solvent or cleaner recommended for that specific material. Follow the product instructions and test in a small, inconspicuous area first.
Professional Help for Difficult Stains:
- For particularly stubborn or large paint splatters or spills, consider seeking professional assistance. They have the expertise and tools to effectively remove the paint without causing damage to the underlying surfaces.
Top Tips:
- For best results, apply masonry paint on a sunny day when the temperature is above 15 degrees Celsius.
- Do not apply masonry paint in direct sunlight or on a windy day.
- Allow each coat of paint to dry completely before applying the next.
- For a smooth finish, use a long-pile roller.
- For a textured finish, use a short-pile roller.
By following this detailed step-by-step guide, you now have the knowledge and confidence to paint your exterior masonry with ease. Remember to choose high-quality masonry paint, such as Sandtex masonry paint or Dulux Weathershield masonry paint, for the best results. Enjoy the process of transforming your home's exterior and creating a fresh and beautiful look that will last for years to come.
